


How to Hem Satin: Blind, Rolled and Machine Hems That Do Not Show
How do you hem satin?
Hem satin with a hand-sewn blind hem for most garments, a narrow rolled hem for light, fluid satin, and a deeper, well-supported hem for heavy satin. Hang the garment first so the cloth settles, mark the length with chalk, finish the raw edge, then fold and stitch with a fine needle and relaxed tension. Press last, with a cloth and low heat. Satin shows every needle hole and every tight stitch, so the secret is patience and a light hand.
This guide explains why satin is harder to hem than most cloth, which hem suits which satin, what tools to use, and step-by-step methods for the three hems most people need. It draws on Wikipedia’s articles on the hem, the blind stitch and the seam, the Canadian Conservation Institute’s note on stitches, and fibre guidance from the University of Georgia. For the wider skills, start with our guide to how to sew satin.
Why is satin hard to hem?
Satin is hard to hem because it slides, frays, marks and puckers. Its long floating yarns lie loose on the surface, so the cloth shifts under the needle, unravels at cut edges and shows any hole or pull. The same qualities that make satin glossy make a poor hem obvious from across a room.
- It slides. The smooth face moves against itself and against the table, so folds shift while you pin and stitch.
- It frays. A cut edge sheds threads quickly, so the raw edge must be enclosed or finished.
- It marks. Needles and pins leave holes that do not close, and steam or a hot iron can leave a shine or a watermark.
- It puckers. Tight thread or a long stitch pulls the floats out of line. The CCI warns that tension causes buckling or gathering.
- It reveals the hem. A glossy surface throws light, so the hem allowance and any stitches show as a line or a shadow.
Wikipedia’s article on the hem notes another point that matters for drape: heavier fabric needs a relatively shorter hem, and hem depth affects how the cloth hangs. That is why a light charmeuse and a heavy duchess satin need different hems.
Which hem suits which satin?
Match the hem to the weight and the job. A light satin needs a narrow, flexible hem, a mid-weight satin suits a blind hem, and a heavy satin needs a hem that spreads its weight. The table sets out the options.

| Satin | Best hem | Why | Avoid |
|---|---|---|---|
| Light charmeuse | Narrow rolled hem, or a narrow double-fold hem | Keeps the edge light and fluid, and adds almost no bulk | A deep, stiff hem that stops the cloth from flowing |
| Crepe-back satin | Blind hem by hand | Hidden stitches suit the two-faced cloth | Visible machine topstitching |
| Mid-weight polyester satin | Blind hem, by hand or machine | Neat and flat, and easy to repeat | Heavy pressing that leaves a ridge |
| Duchess or other heavy satin | Shorter, supported hem, hand sewn | Wikipedia notes heavier cloth needs a shorter hem | A very deep hem that drags the skirt |
| Lined garments | Hem the satin and the lining separately | The lining hangs on its own and does not pull the satin | Sewing the two layers together at the hem |
| Sheer overlay on satin | A narrow rolled hem on the sheer, a separate hem on the satin | Each layer hangs correctly | Joining them in one hem |
If you are unsure of a cloth’s weight, the Satin Database has conversion tables, and a swatch hemmed as a test will tell you more than any chart.
What tools and materials do you need to hem satin?
You need fine tools and matching thread, because heavy tools leave visible damage. The Canadian Conservation Institute’s Note 13/10, Stitches Used in Textile Conservation, advises natural-fibre or polyester-cotton threads, a close match of colour and weight, and, for very fine fabrics such as silk, single-filament thread with a No. 12 needle.

| Tool | Why you need it |
|---|---|
| Fine needle, such as a No. 12 | Makes the smallest holes in the satin |
| Matching thread | Colour and weight matched to the cloth. Natural-fibre or polyester-cotton thread is kinder to fine cloth, per the CCI |
| Fine pins or clips | Pin only in the hem allowance, or use clips, because pin holes show |
| Chalk or a thread tracing | Marks the fold line without leaving a stain |
| Hem gauge or ruler | Keeps the fold even all the way round |
| Press cloth and iron | A cloth between the iron and satin, with the lowest heat that works |
| Rolled-hem foot and blind-hem foot | Machine feet for a narrow hem and a blind hem, as Wikipedia describes |
| A scrap of the same satin | To test the hem, tension and pressing before you touch the garment |

Test your thread before you start. Lay a strand across the cloth in daylight, because artificial light changes colour. A thread a shade darker than the satin usually disappears better than one that is slightly lighter.
How do you prepare satin for hemming?
Prepare satin by letting it hang, marking the length carefully and finishing the raw edge. Skipping these steps is the most common reason a satin hem looks uneven.
- Hang the garment. Let it hang for several hours, or overnight, before marking. Satin, especially cut on the bias, can stretch and settle, and a hem marked too early may drop.
- Try it on with the shoes you will wear. Mark the length with a helper, standing straight, with chalk or a thread tracing.
- Measure up from the floor or down from the waist at several points, and mark a line at an even height.
- Trim the allowance. Leave enough to fold, but keep it modest on heavy satin, as Wikipedia notes heavier cloth needs a shorter hem.
- Finish the raw edge if you will fold it once. Options include overcasting, a zigzag, or binding the edge. Wikipedia describes the Hong Kong finish as a bound seam in which each raw edge is encased separately, and notes bound seams are often used on silk and chiffon.
- Test on a scrap. Make a short sample hem and press it.
How do you sew a blind hem by hand on satin?
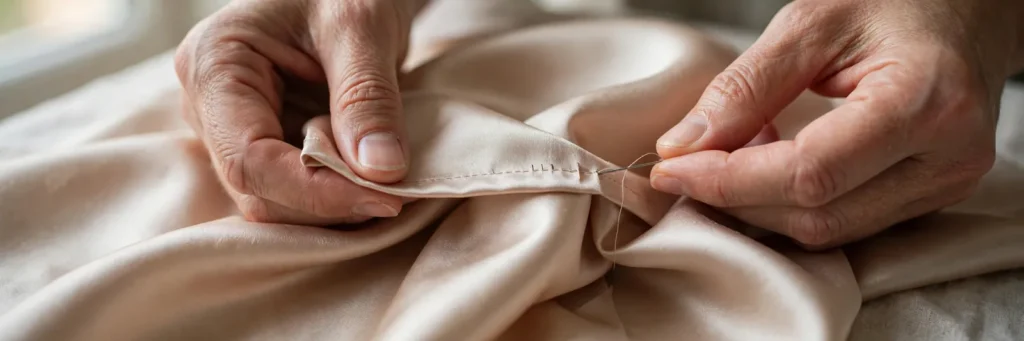
Sew a blind hem by hand with a slip stitch worked inside the fold, catching only a few threads of the garment each time. Wikipedia’s article on the blind stitch says a hand slip stitch or catch stitch can make a blind stitch, worked inside the hem about 1/8 to 1/4 inch from the hem edge, with each pass catching only a few threads so most of the stitching stays hidden. The CCI describes the slip stitch as nearly invisible on the front and worked loosely to avoid tension.
- Fold the hem edge back about 6 millimetres, so you can see the inner fold.
- Fasten the thread inside the fold with a tiny knot or two backstitches, hidden where nothing shows.
- Pick up one or two threads of the garment right beside the hem, using the very tip of the needle.
- Slide the needle through the fold of the hem for about 6 millimetres, bringing it out inside the fold.
- Repeat. Space the stitches about 1 centimetre apart, with thread loose enough to lie slack.
- Check the right side. You should see only a tiny speck. If the cloth dimples, loosen the stitch.
- Finish with two small backstitches hidden in the fold, and trim the thread.
The CCI also describes the herringbone or catch stitch as a way to secure raw edges and hold single-fold hems. It is a good choice when the hem edge is bound or overcast and you want a flexible, secure join.
How do you sew a narrow rolled hem on satin?
Sew a narrow rolled hem by rolling the edge between finger and thumb and stitching it down with tiny stitches, or by using a rolled-hem presser foot on a machine. Wikipedia says a rolled-hem foot makes the hem quick for home sewers and that a hand-rolled hem is a high-class finish, noting an allowance of about 0.6 centimetres for a handkerchief-style edge. On light satin it gives a delicate edge that does not weigh the cloth down.

- Trim the allowance to about 6 millimetres and finish the edge if it frays badly.
- Fold the edge in by about 3 millimetres and press it lightly with a cloth.
- Fold again to enclose the raw edge, and hold the roll between your fingers.
- Stitch with tiny slip stitches or a fine machine stitch, working about 2 millimetres from the fold.
- Keep the roll even. A rolled hem that varies in width looks uneven in satin because the light follows the edge.
- Press gently with a cloth, and let the hem cool before you move it.
If you use a machine, practise with the rolled-hem foot on scraps first. The foot curls the edge as it feeds, and the cloth must be guided gently, because satin that is pulled will stretch and ripple.
How do you sew a blind hem with a machine?
Use a blind-hem presser foot and the machine’s blind-hem stitch, and practise on a scrap first. Wikipedia notes that a sewing machine can make a blind hem, but it needs a specialty presser foot and a blind-hem stitch pattern, and that a zigzag technique can also produce a blind stitch. Factories use blind hemmers that sew a chain stitch with a bent needle.
- Fold the hem as the machine manual directs, with the finished edge showing a few millimetres.
- Set a short, narrow stitch so the bite into the garment is tiny.
- Sew slowly and let the machine feed the cloth. Do not pull.
- Check the front. You should see small pinpricks and no thread. If a stitch shows, narrow the bite.
- Press with a cloth, and check again for dimples.
On slippery satin, tissue paper under the hem or a walking foot helps feed the layers together. Machine hems are faster, but hand hems usually look better on delicate satin because you control every stitch.
How do you hem heavy satin?
Hem heavy satin by hand, keep the hem relatively short, and support the weight so it does not hang from a single line of stitches. Wikipedia describes a dressmaker’s hem for heavy fabric with deep hems, with an extra line of loose running stitch in the middle so the weight of the cloth does not hang from one line of stitching. That principle works well for duchess satin and other heavy cloths. Our guide to fixing snagged satin explains what to do if a thread pulls while you work.
- Keep the hem allowance shorter than you would on light satin.
- Add an extra row of loose stitches halfway along the hem allowance, as Wikipedia describes for deep hems.
- Use a strong, matching thread and keep the stitches relaxed.
- For a full skirt, consider a lining and hem it separately.
- Hang the finished skirt for several hours before the final check.
How do you press a satin hem?
Press a satin hem lightly, from the wrong side, through a cloth, at the lowest heat that works. Pressing sets the fold, but too much heat leaves a shine or a ridge. The University of Georgia Cooperative Extension’s Understand Your Fibers guide notes that polyester melts if it is too hot and needs a low iron with steam, that silk can yellow at high iron temperatures and needs a press cloth, and that acetate melts at low heat and should be pressed damp on the wrong side at the lowest setting.

- Test the heat on a scrap or a hidden seam first.
- Press from the wrong side with a clean white cloth over the satin.
- Lift and press instead of dragging, so the cloth does not stretch.
- Do not press over pins. They leave marks.
- Let the hem cool flat before you hang the garment.
Our guide to how to iron satin covers each fibre in detail.
How do you fix common satin hem problems?
| Problem | Likely cause | Fix |
|---|---|---|
| Puckered hem | Stitches too tight or too long | Unpick, restitch with relaxed tension and smaller stitches |
| Visible stitches on the front | Stitch picks up too much cloth | Pick up only one or two threads of the garment |
| Wavy or uneven hem | Marked before the cloth settled | Rehang the garment and re-mark the length |
| Hem sags in places | Bias stretch or loose stitching | Let it hang, then rehem with smaller stitches |
| Frayed edge shows | The raw edge was not finished | Bind or overcast the edge before folding |
| Shiny line at the hem | Pressed too hot or without a cloth | Cannot be undone, so unpick and re-press only with a cloth next time |
| Pin holes | Pins through the face | Pin only inside the hem allowance next time |
If you are repairing an old hem, our guide to satin repair covers loose hems, split seams and heat damage in more detail.
When should you take satin to a tailor?
Take a satin garment to a tailor when it is valuable, lined, beaded, bias cut or structured. A wedding gown, a silk evening dress or a heavily beaded skirt rewards a professional hand. Ask for someone who has hemmed satin before and can show you an example.
- Wedding and evening gowns. The cost of a mistake is too high.
- Bias-cut dresses. The hem stretches unevenly, and a tailor will hang and level it.
- Beaded or sequinned hems. The beads must be removed and replaced.
- Lined and layered garments. Each layer needs its own hem.
- Silk satin you cannot replace. A conservator or an experienced tailor is safer than a first attempt.
Can you hem satin without sewing?
You can, but the result is usually temporary, and it carries risks on satin. Wikipedia’s article on the hem notes that a hem can be done without sewing, using iron-on materials, netting or clips, and says these methods are uncommon and usually temporary. On satin, an iron-on web needs heat that can melt polyester or scorch silk, and the adhesive can show as a stiff line or a shadow on the face of the cloth.
- Iron-on tape. Needs heat. Test on a scrap, use the lowest setting that works and press through a cloth. It may leave a visible ridge.
- Hem clips or pins. Good for a short-term fix, such as getting through an event, but not for a permanent hem.
- Double-sided tape. Can stick to the cloth and leave residue. Use only for a one-off wear, and take it off carefully.
- Fabric glue. Can stain or stiffen satin, and it is hard to remove. Avoid it on valuable garments.
- When it is worth it. For a costume or a one-night dress that you will not wear again, a temporary hem is acceptable. For anything you want to keep, sew it.
What is a sensible order of work for a whole satin hem?
Work in a fixed order, so each step supports the next. A hem done in a hurry is the one that looks wrong, and satin gives you few chances to correct a mistake without leaving a mark. This sequence works for most hand-sewn hems.
- Hang the garment for several hours so the cloth settles.
- Try it on with the shoes you will wear and mark the length at several points.
- Lay the garment flat, join the marks into an even line and check the line with a ruler.
- Trim the allowance to the depth you need.
- Finish the raw edge if it will be folded once.
- Fold the hem and secure it with clips inside the allowance.
- Sew the hem by hand, with a blind slip stitch, using relaxed tension.
- Press lightly from the wrong side through a cloth.
- Hang the garment again for several hours.
- Check the hem on the body, in daylight and under artificial light, and fix any dips.
Spend extra time on the marking. A hem that is a few millimetres off is easy to see in satin, because the light follows the edge, and it is much harder to correct once the hem is sewn.
Frequently asked questions
What is the best hem for satin?
A hand-sewn blind hem suits most satin. Use a narrow rolled hem on light satin and a shorter, supported hem on heavy satin.
Can you hem satin on a sewing machine?
Yes, with a blind-hem foot, a rolled-hem foot or a straight stitch on a narrow hem. Practise on a scrap first, because satin slides and puckers.
What needle should you use to hem satin?
A fine one. For very fine fabrics such as silk, the Canadian Conservation Institute suggests a No. 12 needle with a single-filament thread.
What thread should you use to hem satin?
Thread that matches the cloth in colour and weight. The CCI advises natural-fibre or polyester-cotton thread for fragile fabrics.
How do you stop satin from fraying at the hem?
Finish the raw edge before you fold it, with overcasting or a bound edge such as a Hong Kong finish, or enclose it in a double-fold or rolled hem.
Why does my satin hem look puckered?
The stitches are too tight or too long. Unpick and restitch with relaxed tension, small stitches and a fine needle.
How do you press a satin hem?
Lightly, from the wrong side, through a cloth, at the lowest heat that works. Polyester melts if too hot and acetate melts at low heat.
Should you hang satin before hemming?
Yes. Let the garment hang for several hours first, especially if it is cut on the bias, so the cloth settles before you mark the length.
Where to go next
For the cloths behind these hems, see our guide to charmeuse satin. The Satin Glossary defines terms such as float, selvage and slip stitch, and the Satin Visual Library shows satin close up. If a hem has already gone wrong, see our guide to polyester satin for how the fibre behaves under heat.


